Use the patient timeline
When you open a study, a timeline with additional studies and reports for the patient is shown at the top of the image viewing area.

Note
The timeline is only shown if enabled by the system administrator.
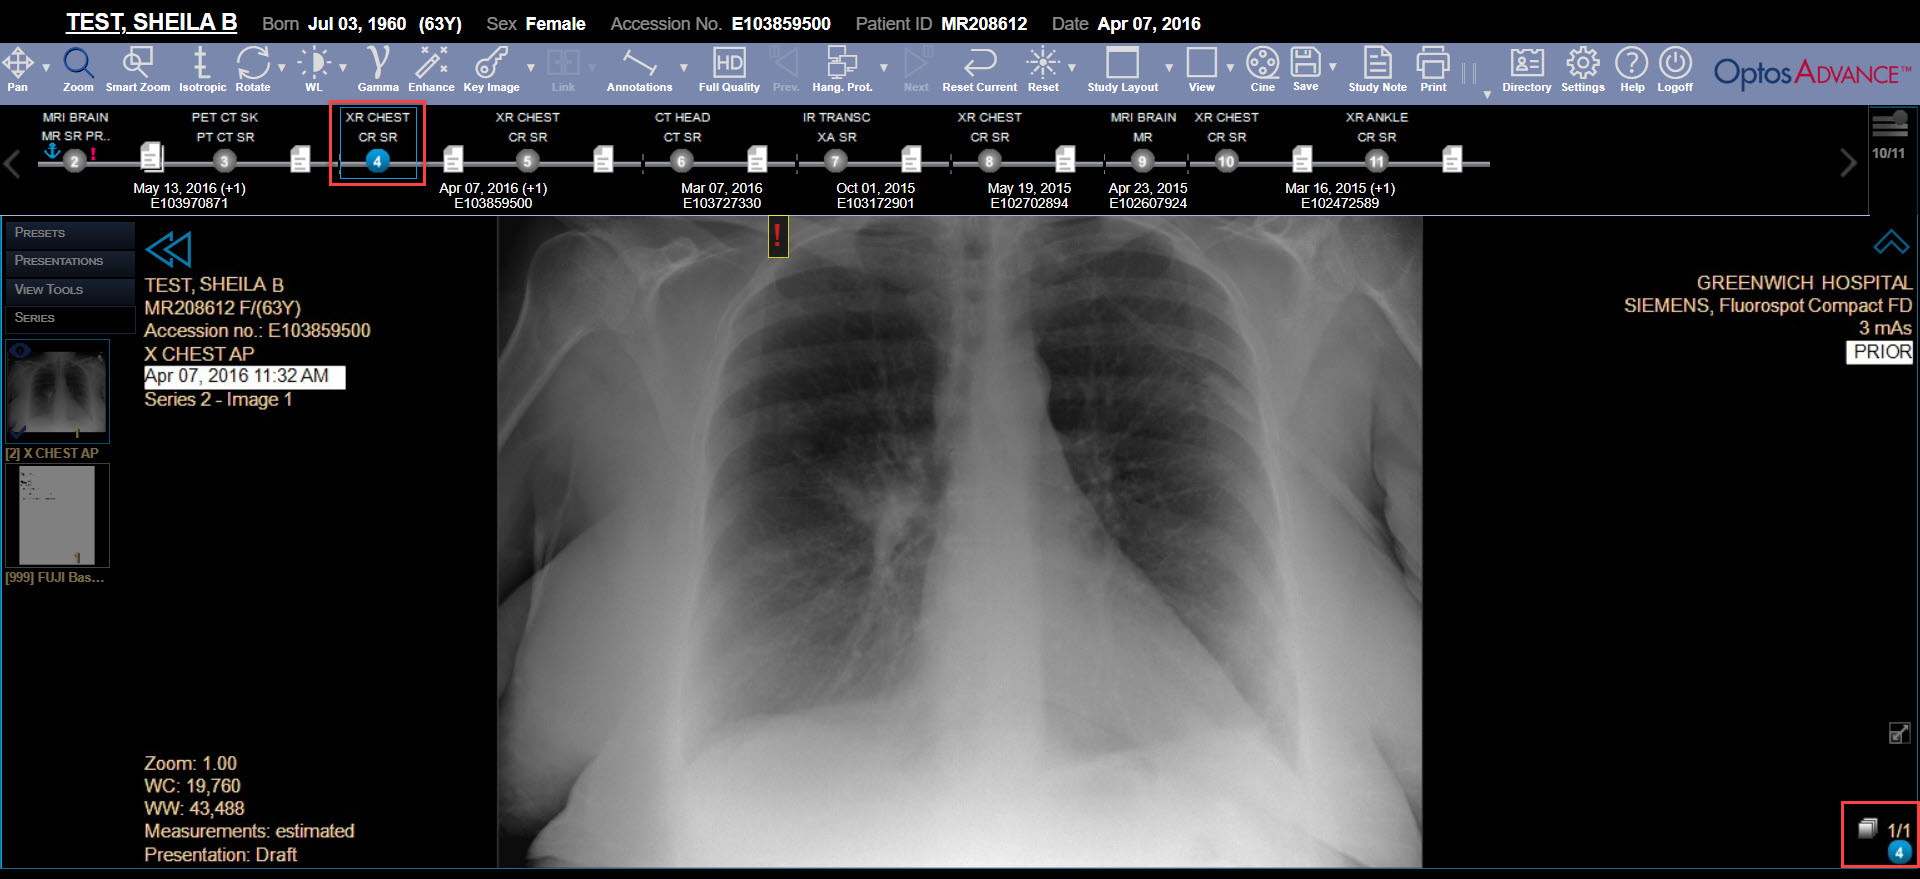
The following information is shown on the timeline:
-
Prior studies and DICOM embedded PDF reports are shown in chronological order.
-
The studies in the timeline are numbered.
-
For studies, the modality and date are shown. For reports, the date is shown.
-
An exclamation mark is shown if a warning exists for a study or report.
-
The current study is marked with an anchor.
In each viewport, the number of the currently loaded study is shown in the bottom-right corner.
View study or report details
Hover over a study or report in the timeline to view more detailed information.
View a study
Select a study in the timeline to load it in all viewports.
or
Drag a study from the timeline to a viewport. This allows you to place different studies in different viewports. A warning appears near the top of the image viewing area stating that multiple studies are displayed.
View a report
Select a report in the timeline. The report opens below the timeline. The following options are available when viewing reports:
- Save Save a PDF copy of the report.
- Print Report Print the report from your browser.
- Vert/Horiz Place the report area on the right side (Vert) or bottom (Horiz) of the screen.
- Maximize/Restore View the report area only and hide the image viewing area (Maximize) or view both the report area and the image viewing area (Restore).
- Close Close the report.
Note
To resize the image viewing and report areas, drag the divider between the two areas.
Select priors to include in the timeline
You can select the priors to include in the timeline.
- Select the filter icon on the right side of the timeline.
The number under the icon indicates how many studies are displayed in the timeline (for example, All or 2/3).
- The Extended Patient Timeline window appears. The available priors are shown at the top of the window.
-
To load a prior in the image viewer, select the prior, then select Load in the bottom-left corner.
- To filter the available priors, select one of the following options beside Select relevant priors:
All. Include all priors.
Manual Selection. Select the check box for the prior to include.
Filtered. Enter search information in the blank row below the column headings. You can select priors based on age, modality and description. -
To view more information about a prior, select the prior, then select one of the following options at the bottom of the window:
-
Study Info View details about the study.
-
Reports View the reports in the study. Select a report to view a preview. When done, select Close.
-
Images View thumbnails of the images in the study. Select a thumbnail to view a preview of the image. When done, select Close.
-
-
Select Set as relevant. The selected prior studies are shown in the timeline.
Hide the timeline
Use the arrow below the timeline to hide or view the timeline.

Note
The timeline content and visibility can also be controlled using hanging protocols (see Set up hanging protocols). Use the Relevant patient history section to automatically display only relevant priors in the timeline. Use the Application preferences section to keep the timeline closed when that specific hanging protocol is in use.
Retrieve prior studies
Use the prior icon in the timeline to trigger a background retrieve of prior studies while reading the current (anchor) study. This behavior is only available for priors located on dicom devices using a ‘cache’ retrieve mode.