Manage secure study links
ADMINISTRATORS ONLY
Secure link settings
You can select the available security options that users can choose when sending secure study links (see Send secure study links). You can customize these settings for each site.
- Select Settings.
- Under System, select Shared Links.
- Select the security options that users can select when sending a study link, then select Save.
Email Options
- Select Show Email Fields to show a field that allows users to enter the recipient’s email address.
Limit Number of Uses
- Select Show Use Limit to show a field that allows users to limit the number of uses for the study link.
- To specify a use limit that cannot be changed by the user, deselect Use limit and enter the limit in the Default value field.
- To specify a default value that can be changed by the user, select Use limit and enter the default value in the Default value field.
Time Limitations
- Select Show Time Limitations to show a field that allows users to set an expiration period for the study link.
- Select Expiration Time Hours to show a field that allows users to set an expiration time in hours. You can also enter a Default value that can be changed by the user. To specify an expiration period that cannot be changed by the user, deselect Show Expiration Time Hours and enter a Default value.
- Select Expiration Time Days to show a field that allows users to set an expiration time in days. You can also enter a Default value that can be changed by the user. To specify an expiration period that cannot be changed by the user, deselect Show Expiration Time Days and enter a Default value.
Login
- Select Show Require Login Option to show a field that allows users to require the recipient to log into their OptosAdvance account before using the link.
- To select this option by default but allow the user to change it, select Login Option and select the Default value checkbox.
- To always require recipients to log into their OptosAdvance account before using the link, deselect Login Option and select the Default value checkbox.
Password
- Select Show Password Option to show a field that allows users to specify a password the recipient is required to enter in order to use the link.
Two Step Confirmation
- Select Show Two Step Confirmation Option to show a field that allows users to use a two-step verification process. The recipient will receive an email with a link to confirm they are the intended recipient. When the recipient clicks the link, they will be sent a second email with the study link. Note that this option is only available if your organization uses an IIS SMTP mail server.
- To select this option by default but allow the user to change it, select Two Step Confirmation and select the Default value checkbox.
- To always require users to use a two-step verification process, deselect Two Step Confirmation and select the Default value checkbox.
Send Link Options
- Select Show Copy to clipboard button to show the Copy link to clipboard button to the user for use when sending the link.
- Select Show email button to show the Click to send link by email button to the user for use when sending the link.
Standalone Link Server Configuration
A standalone server can be configured to send secure links instead of the main server.
- To use a standalone server to serve links, select the Use Standalone Server(s) to serve links option.
- To specify the domain prefix for the configured standalone link server, enter the prefix in the Link Server Domain Prefix field.
- To specify another encryption key, enter the key in the Overwrite Encryption Key field.
Edit the secure link email template
You can modify the template used to create emails for secure links. The template is located in \App_Data\Templates.
View and revoke shared links
You can view an audit trail of study links that have been created. You can also revoke a study link so it is no longer active.
- Select Settings.
- Under System, select Shared Links. Shared links are shown in the Shared link type area. You can view Remote Study Review Links (study links sent by users) and Remote Study Upload Links (links that allow third-party users to upload studies to OptosAdvance).
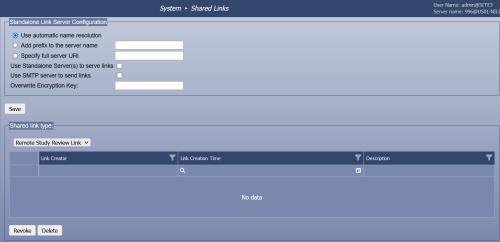
- To revoke a link so it is no longer active, select the checkbox beside the link, then select Revoke.
- To remove a link from the list, select the checkbox beside the link, then select Delete.