Manage study note templates
You can use templates to create different study note layouts.
- Select Settings.
- Under Preferences, select Study Note Templates.
- A list of templates appears. Select Refresh at any time to refresh the list and view the latest changes made by all users.
Add a template
- Select Add. You can also select an existing template, then select Clone.
- Enter the following information, then select Save.
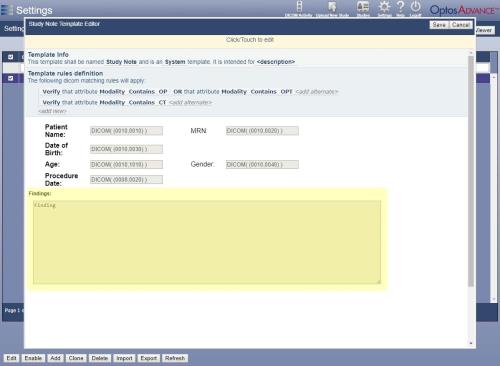
Template Info
- Enter a name for the template.
- Select whether this is a System, Group or User template.
A system template will be available to all users of OptosAdvance, a group template will only be available to the group you specify, and a user template will only be available to the user you specify.
- Enter a description for the template.
Template Rules
You can add rules that determine the types of studies the template applies to. For example, you could state that images must be a specific modality.
If you add multiple rules, the template can only be applied to studies that match all of the rules.
- Select <add new> to add a new rule.
- Customizable areas are underlined and are highlighted when you hover over them. Click (or tap) a customizable area to edit it.
- Select <add alternate> to add an alternate value to a rule. The template can only be applied to studies that match at least one of these values. For example, you could list several modalities the template can be used for.
- To remove a rule, select Verify and switch to Delete.
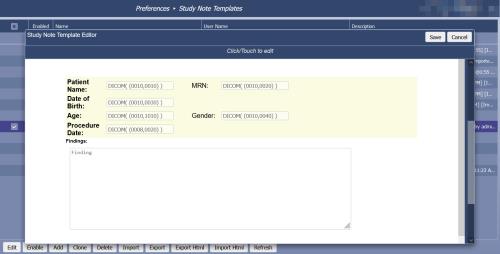
Study Information Header
You can add study information to the header area at the top of the report. This information is taken from the study’s DICOM attributes and cannot be edited in the report. Several default fields are provided by default.
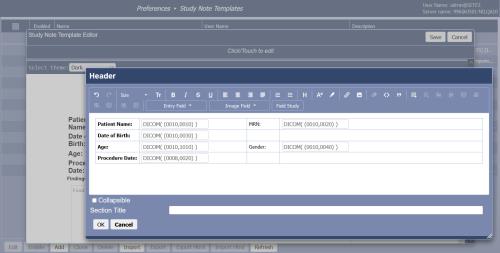
You can add and remove fields in the Header area.
- Click (or tap) the Header area. The Header window appears.
The default fields are arranged in a table with the field label on the left and the field value on the right.
- To add a new label and field:
- Click (or tap) in an empty table cell and type a label.
- Click (or tap) in the adjacent cell. Select Study Field, then select a DICOM attribute.
- To remove a label or field, use the BACKSPACE or DELETE key.
- You can use the toolbar options to format the text (color, font, and so on).
- Click OK to save your changes.
You can add an asset to the Header area. An asset is an item you would typically include on all templates, such as your logo. Saving a file as an asset allows you to quickly add it to any study note template for your site. For details on creating assets, see Manage assets.
- To place an asset before the fields table, place your cursor before the table, then press ENTER.
or
To place an asset after the fields table, place your cursor after the table, then press ENTER.
- Select the Entry Field list, then select Asset.
- Select an asset, then select Add to Template.
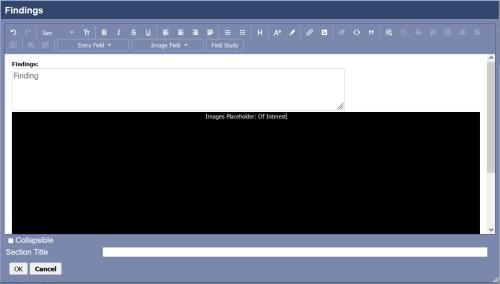
Findings Area
By default, the Findings area contains a single text box where comments can be entered for the report.
To modify the Findings area:
- Click (or tap) the Findings area. The Findings window appears.
- To place an item before the Findings text box, place your cursor before the box, then press ENTER.
or
To place an item after the Findings text box, place your cursor after the box, then press ENTER.
- Select the Entry Field list, then select an option. For example, you can add text entry areas, checkboxes and drop down lists.
- To remove an item, use the BACKSPACE or DELETE key.
- You can use the toolbar options to format the text (color, font, and so on.).
- Click OK to save your changes.
Include images
You can include images in the study note report. You can choose to include key images, secondary capture images, or all images.
- Click (or tap) the Header or Findings area.
- Click to place your cursor where you want to insert the images. You would typically place the images after the Findings box so that the images would appear at the end of the report. For example:
- Select Image Field, then select one of the following options.
- Of Interest Include key images for the study.
- All Secondary Capture Include all secondary capture images for the study.
- All Study Images Include all of the study images.
- Click OK to save your changes.
Edit or delete a template
- Select a template.
- Select Edit. Modify the details, then select Save.
or
Select Delete.
Enable a template
You must enable a template to make it available when viewing a study.
- Select the Enabled checkbox beside a template. You can also select a template, then select Enable.
- To disable a template, deselect the Enabled checkbox beside the template.
Import and export templates
To import a template:
- Select Import.
- Select a file to import, then select OK.
To export a template:
- Select a template.
- Select Export, then select OK. You will be prompted by your browser to save the file.